The tutorial below will work with both ThriveCart’s Legacy/Classic and newer modal carts.
ThriveCart offers a couple of embeddable checkout designs including an inline embeddable checkout form and a popular ‘modal’ (popup) style checkout that overlays on your website.
ThriveCart offers you a couple of ways that the modal cart can be triggered on your site such as using a custom image or by using a button element.
However, their native button element is quite basic when you compare it to dedicated page builders like Elementor and the plethora of add-ons that offer tons of button styles, animation, and customisation.
If you’re wanting to use your own button to trigger a modal checkout from ThriveCart there are 3 things you need to do;
- Add a HTML element to your page containing ThriveCart’s original embed script and a minor bit of styling to remove an old copyright notice.
- Give your button element a CSS Class
- Give your button some custom attributes (Elementor Pro feature)
1. Adding Custom HTML element
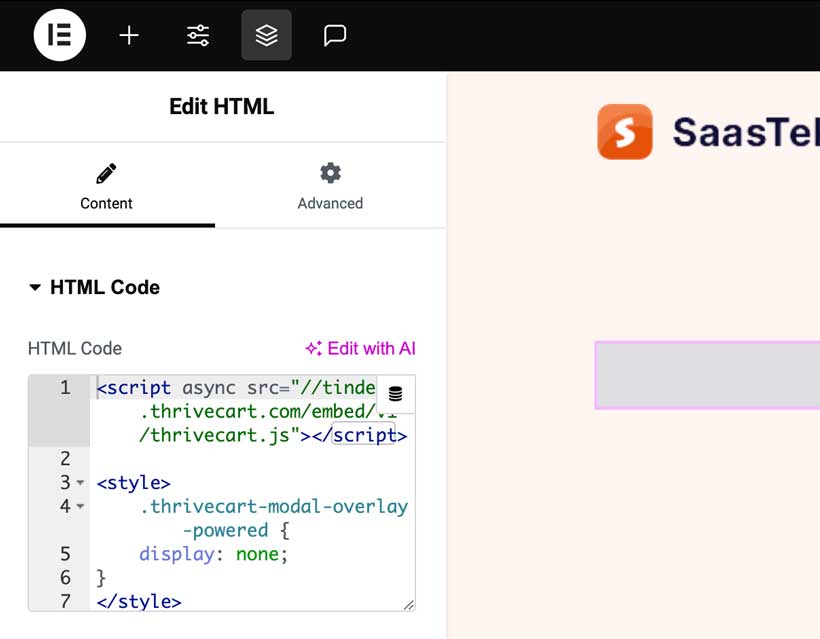
Add a HTML widget to your page. It doesn’t matter where you add this element as it won’t show anything to your visitors.
In this HTML widget, you’ll want to enter the following code;
<script async src="//tinder.thrivecart.com/embed/v1/thrivecart.js"></script>

<style>
    .thrivecart-modal-overlay-powered {
    display: none;
}
</style>
You’ll have something that looks like this:
2. Adding CSS Class to your Button
Next, you’ll want to navigate to the the button(s) you want to use to trigger the modal cart.
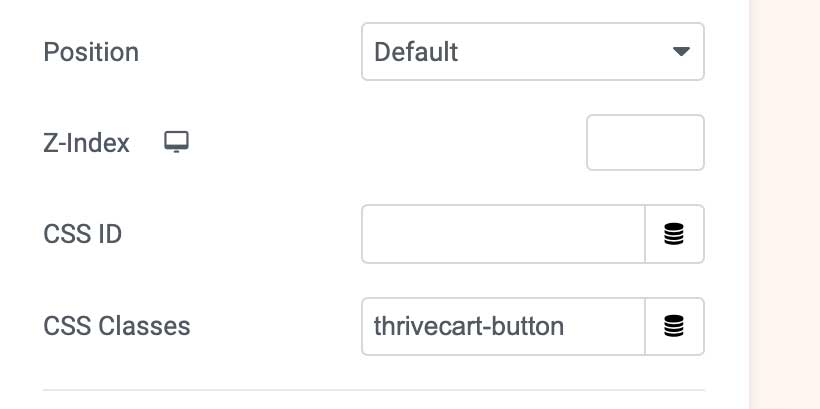
Click on the button and go to the Advanced tab of your widget.
Under Layout go to the CSS Classes field and enter thrivecart-button
You’ll have something that looks like this:
3. Adding custom attributes to your Button
Finally, we need to assign some attributes to your button so it knows what ThriveCart account and what product you want to show in the modal window on your website.
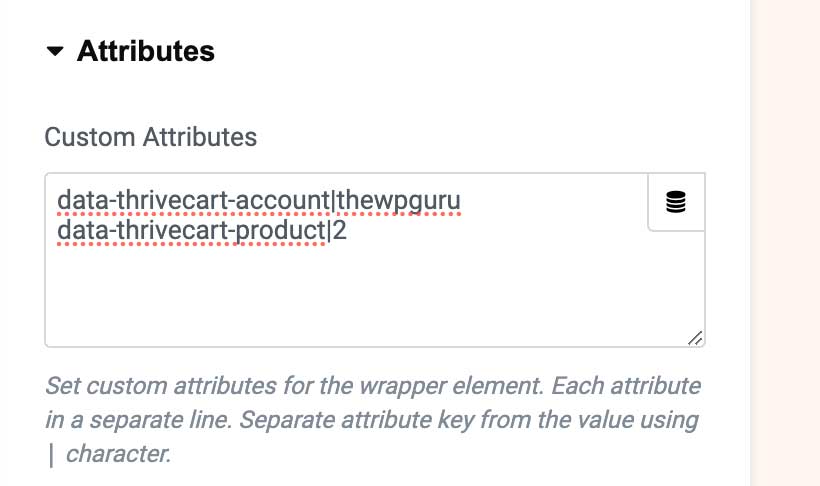
Under the Advanced > Attributes area of your button widget, you’ll want to enter the following
data-thrivecart-account|abc
data-thrivecart-product|X
You’ll replace abc with your ThriveCart account name, if you’re unsure what this is, simply head over to your ThriveCart dashboard and go to your products list. The URL will look like https://thrivecart.com/youraccount/#/products the youraccount part will be your account name and this is what you’ll need to replace abc with.
The X is replaced with a number, specifically the internal ID of your product from within your ThriveCart account. Again, if you’re not sure what this is, you can click on the Get URL button for a product in your dashboard and then look at the URL
You’ll see something like https://thrivecart.com/youraccount/#/products/5/embed the number 5 here is the ID of your product and what you’ll replace X with.
Your Attributes field should look like this;
4. Save your page
You’re all done! You can now save your page and head to your frontend and check things out. By clicking your custom Elementor Button now on your website, you should see your checkout appear as a modal window over your website – allowing your customer to complete their details without leaving your site to do so.
There are a couple of things to note;

